
I wasn't sure what to do this year, because we seem to get in a George Washington/Abe Lincoln rut when we search online for presidential ideas. That was fine when the kids were all younger, but I wanted to do something different this year.
So I woke up Tuesday morning having dreamed up a craft idea:
PRESIDENTIAL BOBBLEHEADS
Yes, I know it doesn't seem very educational. But certainly it sounds fun, don't you think?
We started out that very morning making the project more educational. The kids researched a president that they thought would make an interesting bobble head. Mostly, this was based on physical features ("they" say Lincoln would have never been elected had there been television coverage back then), but then, they read about that president and wrote down a couple interesting facts about that president that they could share with their classmates while presenting their completed craft.
I picked George Washington (it's the wig -- I seriously wanted to do the wig). S decided she'd do Martin Van Buren (she liked the idea of doing a bald head). H chose James Madison because he's so short, I think (not that it matters for a craft of just a head). Z chose Theodore Roosevelt because he loves teddy bears (again, not relevant for the project). J loved the story about William Taft getting stuck in a bathtub, so she decided he'd be perfect for the project ("but Mama, can I do a body, too?"). Finally, O picked another president, but I forget! He hasn't gotten to do his yet because he had some other assignments to finish before doing a fun craft (but he does have the research part done).
S just walked in and reminded me: Abraham Lincoln. That's who O picked. See? We did get ourselves into the same rut, but at least we have some other guys, too.
I had no idea how the craft would turn out. But as the first two bobbleheads were completed on Day 9 of Lent, I have to say that I'm so thankful that the project worked out as well as it has so far! We had a lot of fun, too.
Here are instructions for you if you'd like to follow our homemade plan for making bobbleheads of your own. Don't feel like you have to restrict yourselves to presidents ... you can do anyone.
PRESIDENTIAL BOBBLEHEADS CRAFT
Gather these supplies for each project to be completed:
- Photos or Paintings of the image you want to recreate in bobblehead form
- 1 Plastic cup (large) -- transparent or opaque is fine (we used what we had in the house)
- 1 Paper clip (we used the regular-sized ones that are about an inch long)
- 1 Thumb tack
- 1 Pencil (unsharpened) with an eraser on top
- Masking Tape
- Yarn (for hair) and/or Cotton/Polyester batting (for hair)
- Glue gun
- Paint (we used acrylic) or permanent markers
- Paint supplies (smocks, cup of water for the brush, brushes, paper plates as palates, etc.)
- Various decorative components or embellishments (for example, wiggly eyes)
You can do this project as precise or as artistically-free as you'd like. Feel free to add to or subtract from the above list. I'm just writing it as we did it.
1. First, unbend the smaller section of your paperclip, leaving the larger part curved and making the rest of it as straight as possible. Then set this aside.

2. Then, using a thumbtack, carefully poke a hole in the center of the bottom of the cup. Once it has pierced through, you may need to wiggle it around a bit to widen the hole to accommodate the paper clip. Remove thumb tack.

3. Next, slide the straight part of the paper clip into that hole so that the short side rests on the top of the cup. Find where it touches and use the thumb tack to make a second hole for the other end of the paper clip to slide through. This hole will be slightly off-center.

4. Test the holes by sliding both ends of the paper clip into their respective holes. It should go down almost flush with the top of the cup, with a small section sticking up due to the roundness of the paper clip.

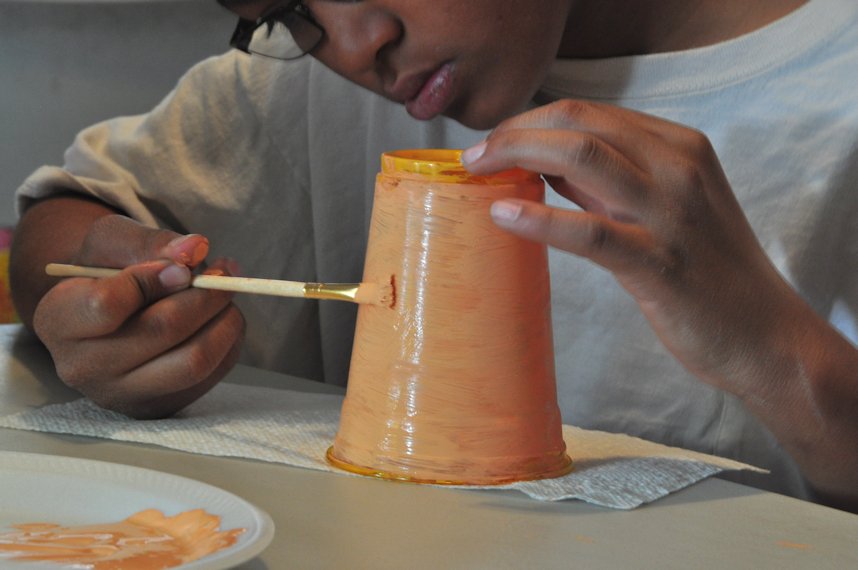
6. Paint (or color) the entire cup (taking care not to clog the paper clip holes) with the appropriate skin color. All the presidents we did had "peach" skin. But in looking at the historical paintings and photographs of these presidents, we noticed that even though they were all peach, they were not all the same shade of peach. So part of the fun (and I helped a lot with this) was creating the shade of paint that closely resembled the skin-shade of each president.
If using acrylic paints, try mixing colors like white, pink, orange, red, brown and yellow to create the right shade of peach. My George Washington appears to have been a much paler white-pink peach shade, than Z's Teddy Roosevelt whose portraits depicted him as having a much more orange-toned peach skin.
7. Once the entire cup is painted and while it is drying, cut lengths of yarn (or pieces of batting) to create the hair. For George Washington and James Madison, we used yarn to create the ponytail part of their hair, while using batting to create the front pieces. If you have pretend hair (like they use for making dolls), feel free to use that instead. Cut the lengths of yarn longer than you think you'll need so you can trim the hair after installing it. Also remember that it will need to be long enough to go over both sides of the cup, not just one side (you'll understand this better in the next few pictures, I think).

8. Once the cup is dry, use the curved part of the paper clip, centered on the yarn pieces (in a bundle) and secure the paper clip into the holes you put into the cup in steps 2 and 3.


9. This is where you start getting really creative and probably deviating a bit from my instructions or the models I will show you as I continue on. Making sure to hold the paper clip in place so it doesn't slide up and out, releasing the yarn hair strands, adjust the yarn around the top of the head (this is for non-bald guys). Using a glue gun or hair ties, position the hair into place as you'd like and trim excess hair.
 | |
| This is the back view of James Madison's hairstyle. See the yarn spread and gathered in back with a little red string and the batting we glued onto the front (you'll see this better in the completed project photos). |
10. Using more paint or other embellishments, create the face on the front of the cup (you decided the front when you styled the hair). Allow to dry.
 | |
| J's President Taft (we did not have brown yarn, so we used golden in place of brown hair and he had a fair amount of "gray" hair, too, hence the white). |
11. This last part is the trickiest part, so adults may have to help or do this for your kids. Remember that pencil and the masking tape I mentioned in the supply list? Now's their time. Put a piece of masking tape loosely near the top end of the pencil.

12. Look inside the cup and you should see both the long straight portion of paper clip sticking through the middle and the shorter section poking through next to it. Turn the cup upside down (to put pressure on the curved part of the clip and push it as much into the cup as possible -- if you used too much hair, this will be problematic and you may have to remove a few strands) and poke the eraser of the pencil onto the short part of the paper clip.


13. Carefully wrap the masking tape around the long, straightened part of the paper clip so that it is held snug against the pencil. You may have to wrap it around a couple times.

14. You are done! Share your bobbling headed president and some interesting facts with others in your class or family.
 |
| Here are James Madison and Theodore Roosevelt (as I had posted in Instagram). George Washington, Abe Lincoln and Martin Van Buren are still in progress. |
Optional: If you would like to secure fabric or ribbon around the pencil (standing in as "clothing") you might do that. So far, our kids have not.
Most of all, have fun with this project. For younger kids, you might do animal heads or monster heads as something that requires a little less patience than to try to match a portrait of someone.
It looks like a fun project! You are very energetic :)
ReplyDelete